Do you want to run a full Linux desktop installation on your Chromebook without giving up ChromeOS? This alteration will give you access to both complete operating systems running simultaneously so you can move between them with a keyboard shortcut.
You may already use the “Crostini” partition to run individual Linux apps alongside ChromeOS. That method forces users to rely mainly on the command line without the added functionality a full Linux desktop environment offers. So installing a complete Linux distribution — desktop and all — may be a better option for you.
A few years ago, I played around with a halfway measure to run a KDE desktop on a Chromebook within the Crostini environment. That method, however, was buggy. Before that, I toyed with running GalliumOS from a USB drive to turn Chromebooks into Linux boxes without removing ChromeOS.
Crostini, Google’s umbrella term for building Linux applications into ChromeOS, installs a command line version of the Linux OS to run Debian Linux apps on supported Chromebooks.
The built-in Crostini partition lets Chromebook users run Linux apps much like Android apps, in a walled-off virtual-machine-like sandbox running on top of ChromeOS.
An alternative approach involves using Crouton. It provides the environment for a full Linux installation, desktop, and all. Crouton is a set of scripts that automatically installs components that create a Chromium OS-centric chroot generator. The term “chroot” is geekspeak for “change root.”
Learning the Lingo
In theory, Chromebook users should be able to use the chroot utility to install most Linux distributions. That, however, requires somebody in those Linux communities to create the scripts based on where each distro stores its files.
So far, the chroot utility scripts readily available for Chromebooks cater to Debian Linux and the Ubuntu Linux distro. Installing Linux distros on some Arm-based Chromebooks may not work. Expect better results using a Chromebook that runs on an Intel processor.
Crouton installs the current Ubuntu Xenial release and your choice of four desktops — LXDE, Unity, Xfce, or Gnome — depending on which command you enter. See the details in the Step Four section.
I installed the Xfce desktop and prefer its added feature set and configuration options. Although I have several newer and more powerful Chromebooks, I did the installation on an Asus Chromebook Flip model C213S.
First released in July 2017, it runs the Intel Celeron CPU N3350 on 4GB RAM. This unit has never buckled under the strain of running ChromeOS with numerous open browser tabs, Android apps in separate windows, and multiple Linux apps under Crostini.
Set Up the Preliminaries
Installing a full Linux distribution on your Chromebook is safe and reliable using the directions below. It is fully reversible.
Before starting, we recommend backing up your existing Chromebook setup. You can restore it with a powerwash or from a recovery USB stick. Check out Google’s help files for details on doing both procedures here.
But typically, all you will have to do should something unexpected happen is go to the Settings menu and turn off the Linux partition. That will remove all traces of the errant Linux installation, and the still-intact ChromeOS will be waiting for you.
To start, ensure that you are running the current version of ChromeOS. Go to Settings > About Chrome OS to check the Chrome OS version or update Chromebook’s operating system. Then make sure that the Linux partition is turned on in the Advanced Settings menu.
Getting Ready for the Crouton Alternative
The built-in Crostini partition cannot handle Linux desktops. It runs Linux commands through the command line interface or CLI and launches installed Linux apps by clicking their launcher icons.
Crouton, as in “Chromium OS Universal Chroot Environment,” goes beyond that limitation. Basically, you must replace Crostini with Crouton.
Do not rush through this process. Double- and triple-check that you are precisely following the instructions.
It is unlikely that a misstep will damage the Chromebook’s core operation. But a mistake will generate an error message. If that happens, redo the failed step until it works.
Be patient while the process proceeds. It will take time for the files to download and install. The Chromebook’s internal hardware and your internet connection speed are factors.
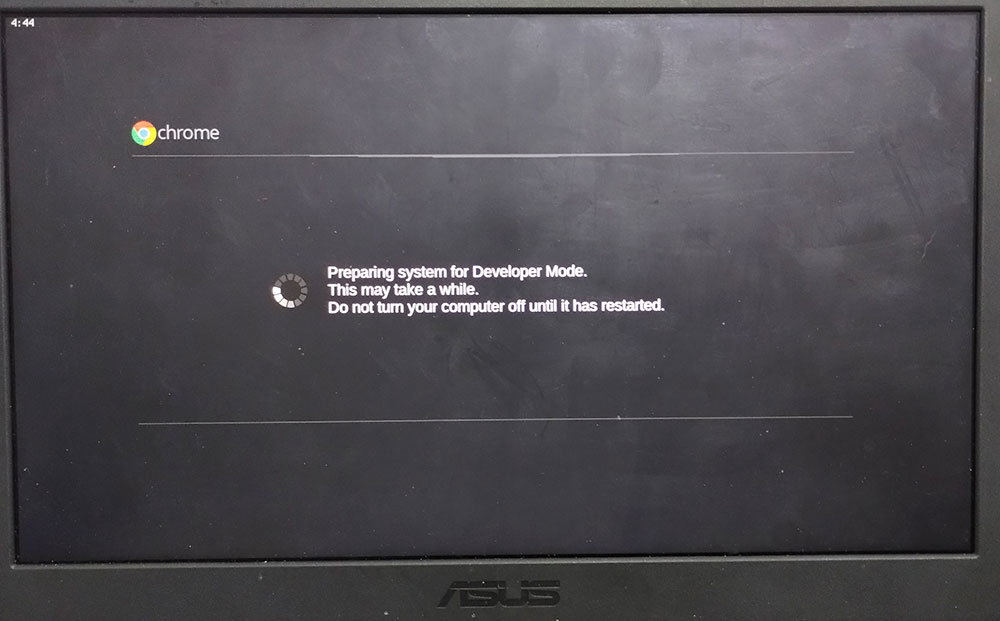
The installation should take about 30 to 45 minutes to complete, provided you get everything correct.
Step 1: Set Up Developer Mode
Turn off your Chromebook. Then turn it back on by pressing and holding the Esc, Refresh, and Power keys simultaneously. Release all three keys once the screen shows signs of powering on.
When the Chromebook screen fully displays, it will show the recovery process screen rather than the ChromeOS screen. Select Advanced Options and then choose Developer Mode. Or you can press Ctrl+D.
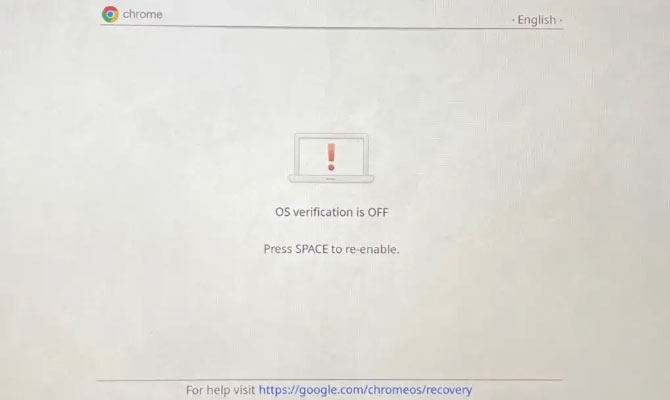
Next, you may see a message asking you to verify the operating system. If so, press Enter.
Then use the arrow keys to scroll down to Advanced options and choose Developer Mode or just press the Ctrl and D keys. The Chromebook should now start in Developer Mode.
NOTE 1: From this point forward, every time you power on the Chromebook, it will load into the OS verification warning screen. No problem. Just wait 30 seconds for the device to start automatically in ChromeOS or press Ctrl+D to boot immediately.
NOTE 2: You can always disable the Chromebook’s Developer Mode status. Do this:
- First, power it off. Then press the power-on button or raise the clamshell lid from its closed position.
- When the Chromebook boots and displays the OS verification message, press the space bar.
Your Chromebook will factory reset and return to its standard configuration. Easy Peasy!
NOTE 3: After the reset, you must go through the first-time user setup. This is where having the backup files mentioned above comes in handy. If your previous configuration had the desktops feature enabled, you will have to reset those flags again to access desktops. But all of your Chrome browser tools and settings will be installed.
Step 2: Download Crouton
This part of the process is quick and straightforward. Download the Crouton files to create the chroot environment. This will create a pure Linux environment on the Chromebook.
Follow this link to download the Crouton files.
Make absolutely sure that you direct it to your Chromebook’s Downloads folder and NOT your Google Drive storage.
Step 3: Completing the Installation
Power off the Chromebook and restart it. Remember, the Chromebook will not load into the expected ChromeOS web browser screen just yet. Instead, it will display the Developer Mode screen. Just press the Ctrl+D keys. When the screen updates, press Ctrl + Alt + T and press Enter to open the Chrome OS terminal.
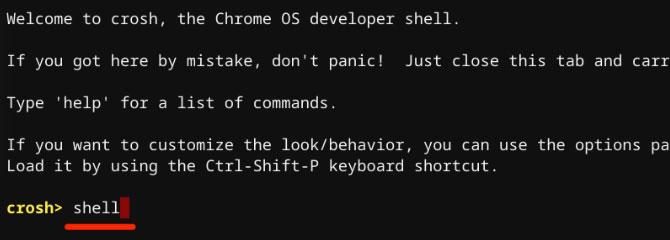
Now type (without quotation marks) the word “shell” and press Enter.
IMPORTANT: Be sure to enter the commands EXACTLY as shown. Omitting or adding spaces not indicated will result in error messages.
Next, enter or paste this command in the terminal to download the Crouton text file to automatically convert it into an executable file:
sudo install -Dt /usr/local/bin -m 755 ~/Downloads/crouton
Press Enter.
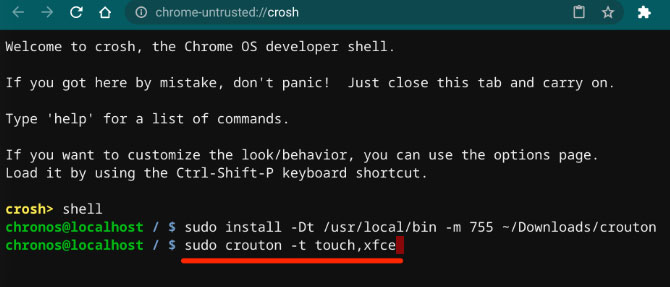
You can encrypt with a passphrase the chroot partition for added security. Just add -e to the end of the installation command before executing it.
Be aware, however, this will require that you type in the encryption password you create each time you enter the chroot environment.
Step 4: Pick Your Desktop Pleasure
This is where you must decide which desktop environment you want Ubuntu Xenial to run. The core command to enter in the terminal is:
sudo crouton -t XXXX
Press Enter. Or, if your Chromebook has a touchscreen, use instead:
sudo crouton -t touch,XXXX
Replace XXXX after -t with the desktop you want to install (all lowercase).
As the installation nears completion, you must set up a password to enter the Linux distro each time.
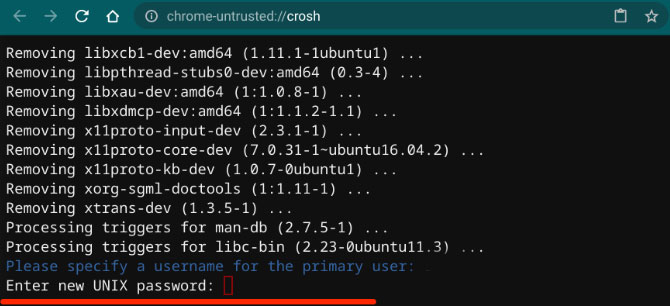
Don’t worry about the reference to UNIX here. Just create a password and repeat it at the next prompt.
Crouton User Tips
Congratulations! You have successfully altered your Chromebook’s configuration to run a full Linux distribution and desktop. Familiarize yourself with these basic processes to ensure a hassle-free Linux experience on your Chromebook.
I. To enter the Linux distribution, follow these steps:
- Upon powering up the Chromebook, press Ctrl+D on the first screen (OS Verification Off).
- Press Ctrl + Alt + T
- Type: shell and press Enter
- Type: sudo enter-chroot startXXXX and press Enter
IMPORTANT: Do NOT use the XXXX’s. Instead, with no space after the word “start,” enter the name of the installed desktop in lowercase. For instance:
sudo enter-chroot startxfce4
sudo enter-chroot startgnome
sudo enter-chroot startlxde
sudo enter-chroot startunity
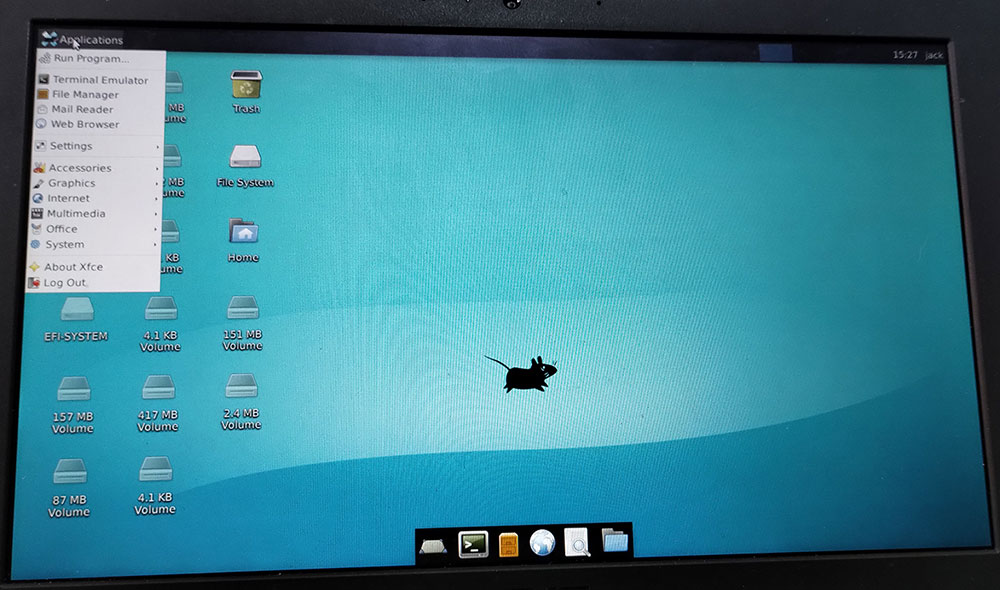
II. Cycle between the Chrome OS and Linux desktops without rebooting the Chromebook.
The keys involved vary slightly depending on your device’s architecture:
- For Arm-based machines, use Ctrl+Alt+Shift+Forward and Ctrl+Alt+Shift+Back.
- For Intel-based machines, use Ctrl+Alt+Back and Ctrl+Alt+Forward; then Ctrl+Alt+Refresh. (I did not have to use the Refresh shortcut on my Intel-powered Asus Chromebook.)
How To Remove a Crouton Installation
If you decide that keeping the full Linux installation on your Chromebook is not for you, you can easily remove it. One method was mentioned above, hitting the space bar when the OS verification screen appears. Here is a second option:
Press Ctrl+Alt+T to enter the ChromeOS shell. Then enter this command:
cd /usr/local/chroots
Press Enter. Then type:
sudo delete-chroot *
Press Enter. Then type:
rm -rf /usr/local/bin
Press Enter.
Chromebook Restoration Option
If something goes astray along the way, you can restore your Chromebook by retrieving the backup files stored on Google Drive. But this method only works if you have already configured your device to back up automatically.
Enter Recovery Mode by pressing and holding the Esc + Refresh keys simultaneously. Then press the Power button and release it.
Final Note
Numerous variables can affect how the Linux distro loads. These include the make and model of your Chromebook and interim updates in the Crouton installation files that interfere with these current directions.
If you are unable to enter the chroot partition or load Ubuntu, search the internet for help, as your Chromebook’s manufacturer or even Google’s assistance will not be able to answer your questions.
A starting point to research a solution is GitHub.
Suggest a Topic
Is there a tutorial you’d like to see featured?
Email your ideas to me and I’ll consider them for a future column.
And use the Reader Comments feature below to provide your input!
